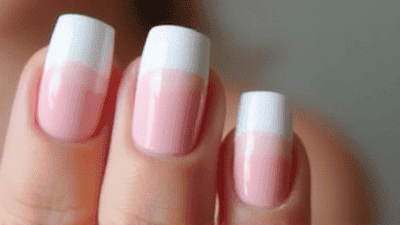
The world of nail art continues to evolve, presenting new trends that challenge traditional concepts of beauty. Among these trends, matte nails have emerged as a chic and modern style that adds a refined twist to any manicure. The sleek, non-reflective finish of matte nail polish offers a unique contrast to the traditional glossy look, allowing for endless creative possibilities. In this blog post, we will delve into the allure of matte nails, explore various stylish designs, and provide you with inspiration to achieve stunning matte nail art for your next manicure.
Matte nail polish has gained popularity for its sophisticated and trendy appearance. Here are a few reasons why matte nail art is a fabulous choice for your next manicure:
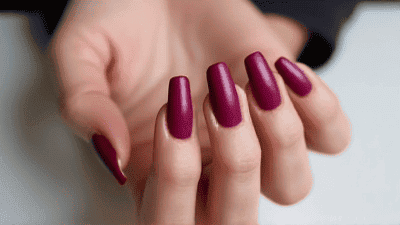
Matte nails present a non-glossy finish that sets them apart from typical nail polish. This distinctive look offers an opportunity to showcase colors and designs in a new light.
Matte nail art can suit various occasions, from casual outings to formal events. It can easily complement any outfit or style, making it a versatile choice for nail enthusiasts.
The matte finish provides a beautiful contrast when combined with glossy elements, such as glitter or metallics. This interplay of textures can create depth and interest in your nail designs.
Matte nails evoke a contemporary feel, making them ideal for those who want to embrace a modern and stylish look. They align well with current fashion trends and add a touch of edgy elegance.
Many matte polishes are long-lasting, often proving more chip-resistant than their glossy counterparts. This durability makes matte nail art a practical choice for everyday wear.
Before you embark on your matte nail art journey, it’s essential to have the right tools and products at your disposal. Here’s a list of what you’ll need for creating beautiful matte designs:
Matte Nail Polish: Invest in a selection of high-quality matte nail polishes in various colors. Look for brands known for their rich pigmentation and smooth application.
Base Coat: A good base coat is critical for protecting your nails and ensuring better adhesion of the polish.
Top Coat: Opt for a matte top coat specifically designed to achieve that flat finish. Some polishes come with a matte finish built-in, but a dedicated matte top coat can enhance longevity.
Nail Art Brushes: A variety of nail art brushes, especially fine-tipped brushes, will help you create intricate designs with precision.
Dotting Tools: Dotting tools come in handy for creating polka dots and other detailed designs on your nails.
Striping Tape: This tape allows you to create clean lines and geometric patterns, adding sophistication to your matte designs.
Makeup Sponges: Use these for techniques like sponging or gradient effects, which can be created with matte polishes.
Nail File and Buffer: Keep your nails smooth and well-shaped for a polished appearance.
Cotton Pads: These are essential for cleanup and correcting any mistakes during your nail art process.
Acetone-Free Nail Polish Remover: Use a gentle remover to avoid drying out your nails after the manicure.
A successful matte manicure starts with proper nail preparation. Here’s how to prepare your nails for a flawless finish:
Begin by washing your hands thoroughly and removing any old nail polish. Make sure your nails are clean and free from oils or residue.
Use a nail clipper to trim your nails to your desired length. Then, file them to achieve your preferred shape, whether that’s round, square, or almond.
Gently push back your cuticles using a cuticle pusher or orange stick. This step creates a neat edge and provides a better surface for polish application.
Lightly buff the surface of your nails to create a smooth canvas. This step ensures that the matte polish adheres well and reduces any imperfections.
Apply a thin layer of base coat to protect your natural nails. Allow it to dry completely before moving on to your matte polish.
Now that your nails are prepped, it’s time to explore various matte nail art designs. Here are some stylish ideas to inspire your next manicure:
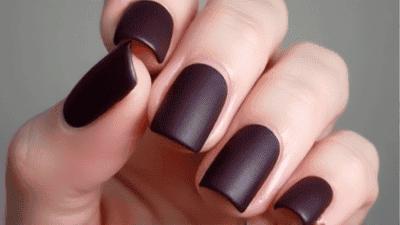
Sometimes, simplicity is the key to sophistication. A solid matte color can make a bold statement.
Create a stunning gradient effect with matte ombre nails. This design seamlessly blends two or more colors for an eye-catching look.
Combine matte and glossy finishes for a chic twist. This design highlights the contrast between the two textures, creating depth.
Geometric designs are modern and playful, perfect for those who want to embrace a trendy look.
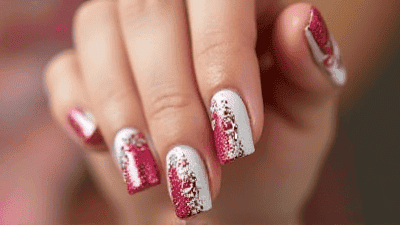
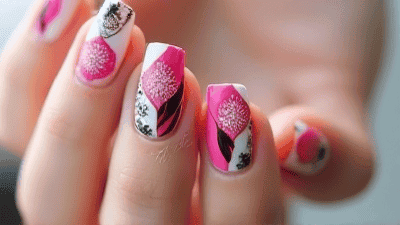
Floral designs are romantic and elegant, making them ideal for special occasions or springtime events.
A fun and classic design, polka dots are easy to achieve and add a playful element to your matte manicure.
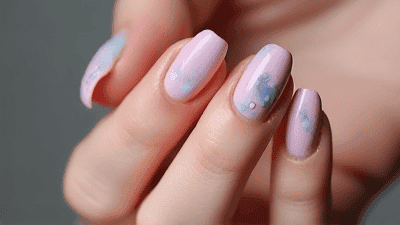
Matte marble nails embody elegance and sophistication, perfect for formal events.
Adding texture to your matte nails creates visual interest and can mimic different materials.
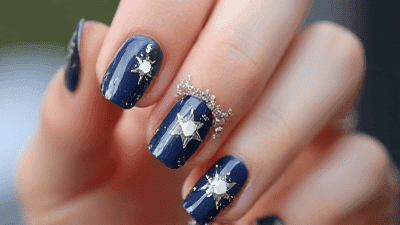
Capture the beauty of the night sky with a starry design on your matte nails.
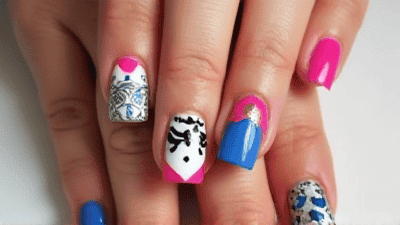
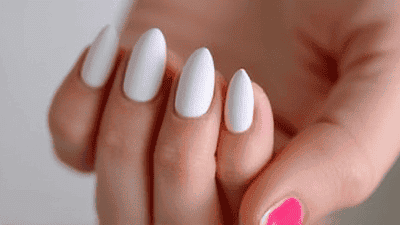
For a more subtle take on matte nail art, consider accent nails. This design features matte polish on most nails while showcasing a unique design on one or two accent nails.
To ensure your matte nail art looks stunning, here are some helpful tips:
Invest in high-quality matte nail polishes and top coats that provide a smooth application and finish. This can make a significant difference in the final look of your nail art.
When applying matte polish, ensure you use thin layers to avoid streaking. Allow each layer to dry completely before applying the next.
Matte polishes can be sensitive to overworking. After applying a coat, allow it to dry before applying any additional layers or designs.
When switching between colors or designs, ensure your brushes and tools are clean. This will prevent unwanted mixing of colors and keep your designs crisp.
Healthy nails are essential for showcasing beautiful nail art. Regularly moisturize your cuticles and maintain your nails to keep them strong and glossy.
After you’ve rocked your stunning matte manicure, proper care will ensure your nails stay looking their best. Here are some tips for maintaining your matte nails:
Oil-based products can cause matte finishes to become shiny. Be cautious when using hand creams or moisturizers on your nails, and consider wearing gloves.
Be gentle with your nails to avoid chipping or damaging the matte finish. Avoid using your nails as tools and try to engage in activities that minimize wear and tear.
If your matte nails begin to look dull, consider refreshing them with a new coat of matte top coat as a quick fix.
Consider regular nail care routines to maintain nail health. This includes buffing, trimming, and moisturizing to ensure your nails look beautiful even when not polished.
When removing matte polish, use an acetone-free remover to avoid drying out your nails. Soak a cotton pad with remover, place it on your nail, and wait before wiping away the polish for easier removal.
Matte nails offer a stylish alternative to traditional glossy finishes, providing a modern touch that enhances your manicure. With their versatility and unique aesthetic, matte nail art can adapt to any occasion or outfit, making them a must-try for nail enthusiasts.
From solid colors and ombre gradients to geometric patterns and floral designs, the possibilities with matte nail art are endless. Don't hesitate to experiment with different techniques, colors, and finishes to create unique looks that reflect your personality and style.
As you embark on your matte nail journey, remember to maintain nail health and invest in quality products to achieve stunning results. Embrace the magic of matte, and let your nails be a canvas for creativity and self-expression.