In recent years, the allure of nail art has captivated beauty enthusiasts around the globe. With a vast array of techniques, colors, and styles to choose from, nail art provides a perfect platform for self-expression. However, visiting a salon regularly can be costly and time-consuming. Fortunately, creating stunning manicures at home has never been more accessible. Whether you’re a beginner or looking to refine your skills, this comprehensive guide will equip you with tips and tricks to master DIY nail art and achieve salon-worthy results right in your own home.
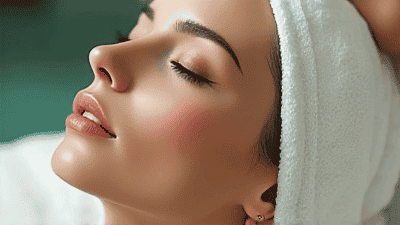
Before diving into specific techniques and designs, it's essential to understand a few basic concepts related to nail health and nail art preparation.
Our nails consist of several parts, including:
Understanding these components helps to appreciate the importance of proper nail care and maintenance, which is crucial for successful nail art.
Preparation is a critical step for a flawless manicure. Here’s how to prepare your nails for art:
Start with Hygiene: Wash your hands thoroughly and remove any old nail polish. Use an acetone-free nail polish remover to minimize dryness.
Shape Your Nails: Use a nail clipper to trim your nails if necessary, then file them into your desired shape, whether that's square, oval, or almond.
Push Back the Cuticles: Gently push back your cuticles using a cuticle pusher or a wooden stick. This step helps create a neat edge and allows for easier application of polish.
Moisturize: Apply cuticle oil and a hand cream to ensure your skin and cuticles are hydrated. Healthy cuticles are essential for achieving a polished look.
Buff Your Nails: Lightly buff the surface of your nails with a nail buffer to create a smooth canvas for polish application.
Apply a Base Coat: Always apply a base coat to protect your nails from staining and to allow the nail polish to adhere better.
To achieve stunning nail art at home, it is vital to have the right tools and products. Here is a list of essentials you'll need in your nail art toolkit:
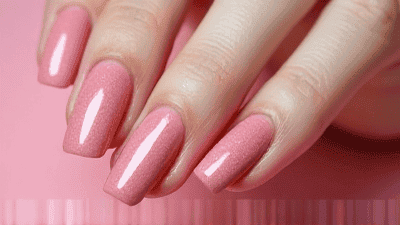
Nail Polish: Invest in a range of colors, including neutrals, pastels, bold hues, and a few special finishes like glitter or metallics.
Nail Art Brushes: These come in various shapes and sizes. Fine-tipped brushes are excellent for detailed designs, while wider brushes can cover larger areas.
Dotting Tools: These are small tools with rounded ends that help create dots of various sizes on your nails.
Striping Tape: This thin tape helps achieve precise lines and geometric designs and can create intricate patterns.
Makeup Sponges: Useful for creating gradient effects and applying glitter smoothly.
Nail Stamps and Stamping Plates: Stamps allow you to transfer intricate designs from stamping plates to your nails effortlessly.
Tweezers: Handy for picking up small nail art embellishments like gems and sequins.
Small Scissors: Helpful for trimming excess tape or embellishments.
Cotton Pads and Q-tips: Necessary for cleanup and correcting mistakes.
Nail File and Buffer: Essential for shaping nails and smoothing rough edges.
Base Coat: Protects and prepares the nail for polish application.
Nail Polish: Choose high-quality polishes for better application and longevity.
Top Coat: A glossy top coat adds shine and protects your design; a matte top coat can create a unique finish.
Nail Glue: Helps adhere embellishments or press-on nails securely.
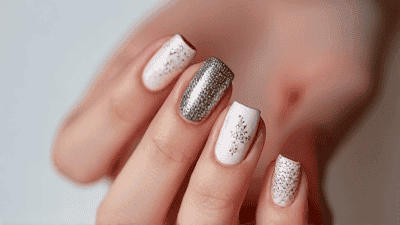
Nail Art Foils: These add an eye-catching metallic finish to your designs.
Glitter Polish: Adds sparkle and dimension to your nails.
Once you have your tools and products ready, it's time to get crafting! Here are some essential nail art techniques that form the foundation for your DIY designs.
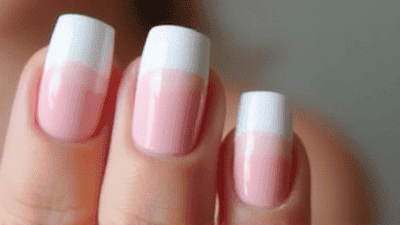
The most fundamental technique, but often overlooked, is the proper application of nail polish. Here’s how to do it:
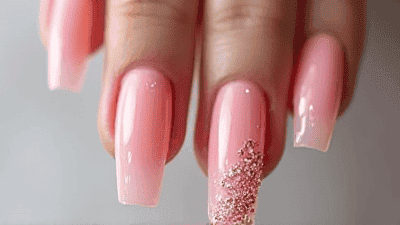
Creating a gradient effect can add depth and dimension to your manicure. Here’s how to achieve this look:
Dots are a versatile design element that can be used in various ways. Follow these steps:
Striped designs can add a chic touch to any manicure. Here’s how to create clean stripes:
Nail stamping allows you to create intricate designs with ease. Here’s a simplified process:
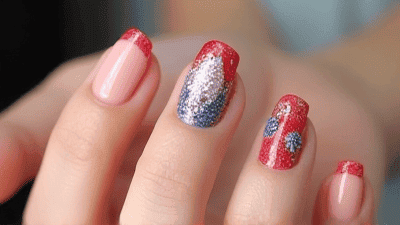
Add sparkle and glam to your nails using foils and glitter. Here’s how to apply them:
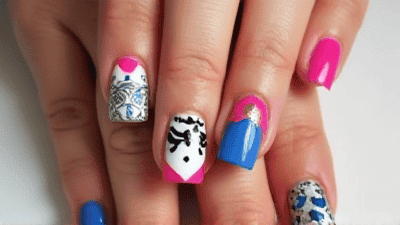
As you get comfortable with nail art techniques, you may want to try specific designs. Here are some fun and trendy nail art ideas for inspiration:
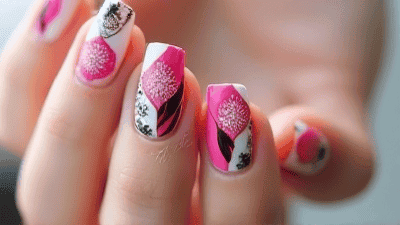
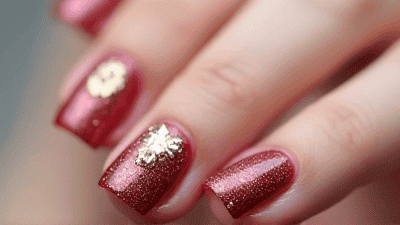
Flowers are always a popular choice for nail art. You can use dotting tools or brushes to create beautiful blooms in various colors. Experiment with layering colors to achieve depth in your floral designs.
Geometric nail art, featuring triangles, stripes, and abstract shapes, can give your nails a modern and stylish edge. Use striping tape for clean lines and sharp shapes.
From leopard spots to zebra stripes, animal prints can be playful and chic. Use a fine brush and contrasting colors to create these fun designs on your nails.
The marble effect can be achieved with water marbling or sponge techniques. Create a sophisticated look by blending colors to mimic the appearance of marble.
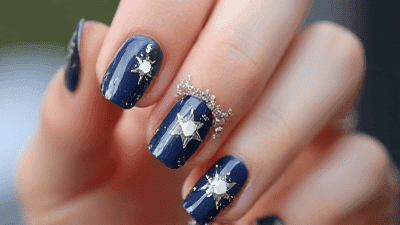
Get creative with seasonal nail art by reflecting the time of year. Think pastel colors and florals for spring, bold colors for summer, earth tones for fall, and glittery designs for winter.
Combine the gradient technique with glitter polish for a fabulous look. Start with an ombre gradient and gradually place glitter at the tips to create a stunning fade.
Even experienced nail artists encounter occasional challenges. Here are some common nail art problems and solutions to help you overcome them:
If your polish appears streaky or uneven, apply thinner coats of polish and allow each layer to dry fully before adding the next. Use a quality brush for even distribution.
Bubbles can form during application if the polish is shaken too vigorously. Instead, roll the bottle between your palms to mix the polish gently. Applying polish in thin layers can also help reduce bubbling.
To prevent chipping, make sure each coat of polish is fully dry before proceeding. Use a top coat, and reapply it every few days for added protection. Avoid using your nails as tools to prevent unnecessary wear.
Ensure each layer is dry before moving on to the next step. If you find yourself in a rush, consider using a quick-dry top coat to seal your design quickly.
Sometimes nails can appear thick due to excessive layers of polish. To avoid this, try to keep your layers thin and even. A quality top coat should provide a glossy finish without needing multiple heavy layers.
Before and after your nail art applications, it's crucial to maintain healthy nails. Here are some essential nail care tips to keep your nails in top shape:
Drinking adequate water is essential for overall health, including nail health. Staying hydrated helps maintain flexibility and strength in your nails.
Regularly apply cuticle oil to nourish and hydrate your cuticles. Healthy cuticles create a better base for artistic designs and help prevent hangnails.
Frequent use of acetone-based nail polish removers can dehydrate your nails. Opt for acetone-free removers to minimize damage.
Avoid wearing polish for extended periods. Allow your nails to rest and recover between manicures to prevent discoloration and brittleness.
Avoid using your nails as tools for opening packages or scratching surfaces to prevent breakage. When engaging in tasks that could damage your nails, consider wearing gloves for protection.
Creating beautiful nail art at home is an enjoyable and rewarding process that allows you to express your creativity. With the right tools, techniques, and a little practice, you can achieve stunning results comparable to salon manicures. Experiment with different styles and techniques, and don't be afraid to make mistakes along the way. Nail art is about fun and self-expression, so let your imagination run wild.
As you embark on your DIY nail journey, remember that patience and practice are key. With each new design, you'll develop your skills and find inspiration. Embrace the creative process, and enjoy the empowering feeling of displaying your unique nail art for the world to see. Happy painting!