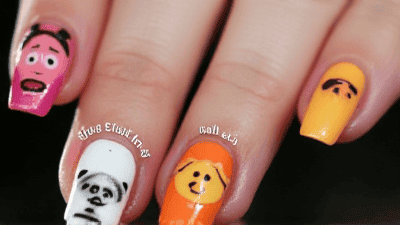
Nail art has transcended beyond simple polish applications; it has evolved into a canvas where creativity and personality shine through. One of the most exciting and dynamic styles of nail art is animal print, which showcases a range of playful designs and textures. Among the various inspirations in animal print, insect prints present a unique opportunity to blend bold colors and intricate patterns that celebrate nature’s beauty. This comprehensive blog post will explore fun and playful animal insect print nail art ideas, along with techniques, tips, and inspiration to help you create stunning nail designs.
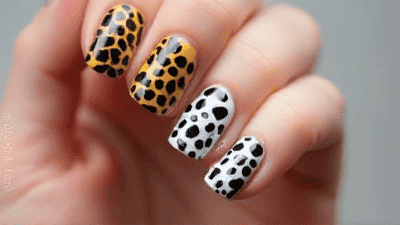
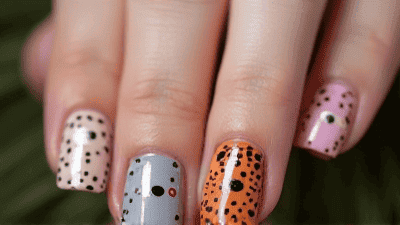
Animal print has always served as a powerful statement in fashion. When it comes to nail art, animal prints allow for self-expression, creativity, and a touch of the wild. Insect-inspired designs take this concept a step further by offering distinctive patterns that can be both whimsical and bold. Here are a few reasons why insect prints are captivating for nail art:
Insects are incredibly diverse, featuring unique shapes and patterns that can inspire intricate nail art designs. Whether it’s the delicate wings of a butterfly or the striking spots of a ladybug, these patterns offer endless creative potential.
Many insects boast a wide array of colors, from the electric hues of tropical butterflies to the metallic finishes of beetles. This vibrant color palette allows for dynamic and eye-catching nail designs that stand out.
Insect prints can be tailored to various styles, from subtle and elegant to bold and dramatic. This versatility makes them suitable for any occasion, whether it’s a casual day out or a glamorous night on the town.
Insect prints celebrate the beauty of the natural world. Many people find joy and inspiration in nature, and incorporating insect designs into nail art allows them to carry a piece of that beauty with them.
Insect prints add a playful element to nail art. Whether you opt for cartoonish designs or realistic depictions, these prints can inject a sense of fun and creativity into your overall look.
Before you embark on your journey to create stunning insect-inspired nail art, gather the necessary tools and products to ensure a smooth and enjoyable experience.
Nail Polishes: Invest in a variety of colors, including a good base coat, top coat, and a selection of shades to represent different insect patterns. Bright colors, pastels, and even metallic shades can all be used.
Nail Art Brushes: Fine-tipped brushes are essential for creating detailed designs. Consider getting a few different sizes for various applications.
Dotting Tools: These are perfect for creating dots, eyes, and other small details intricately related to insect designs.
Striping Tape: Useful for creating clean lines or sections in your designs, striping tape can help to achieve precise patterns.
Makeup Sponges: These can assist in blending colors or creating ombre effects.
Nail Stamp Kits: Stamping plates with insect designs can save time and allow for intricate details without a steady hand.
Tweezers: Helpful for placing small embellishments or picking up stickers.
Cotton Pads and Acetone: Essential for cleanup and correcting mistakes.
Base Coat: A good quality base coat protects your nails and improves polish adhesion.
Top Coat: A glossy top coat adds shine and protects your designs, extending their wear time.
Nail Polish Remover: Opt for acetone-free removers to keep your nails healthy.
Cuticle Oil: Regularly applying cuticle oil keeps your cuticles hydrated and your nails looking polished.
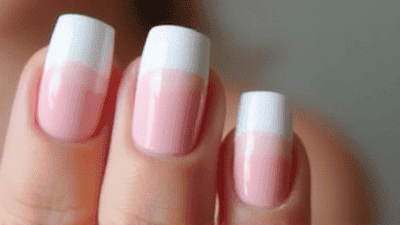
To achieve stunning insect print nail art, proper nail preparation is vital. Follow these steps to get your nails ready for colorful designs:
Start by washing your hands thoroughly and removing any old nail polish. This ensures you have a fresh surface to work on.
Trim your nails to your desired length using a nail clipper, then file them into your preferred shape. Popular shapes include square, round, and almond.
Using a cuticle pusher or wooden stick, gently push back your cuticles to create a clean edge around your nails.
Lightly buff the surface of your nails to create a smooth canvas for your polish. This step helps with adhesion and provides a flawless finish.
Finish preparing your nails with a thin layer of base coat. Allow it to dry completely before moving on to the colored polish.
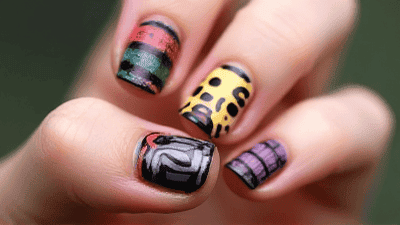
Once your nails are prepped, it’s time to explore various techniques and designs for insect-inspired nail art. Below are some fun and playful ideas to get your creative juices flowing.
Butterflies are a popular insect choice for nail art due to their colorful and intricate wing patterns.
Ladybugs are not only adorable but also make for charming nail art designs.
Beetles often have striking colors and patterns, making them perfect for fun nail art.
Create a fun and cartoonish look with bug-eyed designs.
Ants may not be the first insect you think of, but they can inspire playful nail designs.
Explore more specific insect-themed prints that you can incorporate into your nail art designs:
Dragonflies have delicate wings that can be mimicked with nail art.
Make use of the vivid colors of tropical butterflies.
Monarch butterflies are striking and instantly recognizable.
Don’t forget about the little guys! Incorporate ant-themed designs into your prints.
Caterpillars can be transformed into cute nail designs.
Even when embarking on creative insect nail art, you may face challenges along the way. Here are some common issues and solutions:
If your polish appears streaky or uneven, ensure you’re applying thin layers and allowing each coat to dry completely before adding a new one.
When blending colors, ensure each polish is dry before layering another over it. Consider using a makeup sponge to help with the gradient effect.
To avoid smudging, be patient and allow for complete drying time between layers of polish and your final top coat.
Keep small brushes or cotton swabs dipped in acetone handy to clean up around the edges of your nails if you accidentally paint on your skin.
If your tools are not cooperating, consider practicing on paper before applying designs directly to your nails. This will help you develop your technique.
After you’ve created beautiful insect-inspired designs, caring for your nails is essential to maintain their look and health:
Apply cuticle oil regularly to keep cuticles hydrated and healthy. This helps prevent cracking and peeling.
Be mindful of how you treat your nails during daily activities. Wearing gloves while cleaning or doing chores can prevent damage.
Reapply a top coat every few days to preserve the shine of your nail art and prevent chipping.
Every once in a while, take a break from nail polish to allow your nails to breathe and maintain their strength.
When possible, try to keep your hands out of water for extended periods to prevent polish from wearing prematurely.
As you experiment with insect-themed designs, consider these trendy color combinations to incorporate into your nail art:
Great for mimicking the colors of insects like caterpillars or grasshoppers.
Classic colors often associated with ladybugs; these colors create a striking contrast.
Soft hues can create an elegant look, ideal for butterfly designs.
Using metallic polishes can mimic the sheen of beetles and add an elevated touch to your designs.
For a fun and playful twist, consider using neon colors to represent insects in a modern way.
Insect print nail art offers a beautiful fusion of creativity, nature, and self-expression. With a myriad of designs to explore—from butterflies to ladybugs—the possibilities are endless. Whether you prefer vibrant colors or soft pastels, insect prints can add uniqueness to your nail art journey.
As you embrace the lively world of animal-inspired nail designs, let your creativity soar. Remember that nail art is about experimentation, so don’t hesitate to mix patterns, colors, and techniques to discover your personal style.
Gather your tools, get inspired by the incredible designs found in nature, and create stunning insect prints that will celebrate the playful essence of the natural world.